HOW DO I USE THE BROW STAMP KIT?Updated 4 months ago
✅ 1️⃣Twist your Brow Stamp into the pomade that's located in the cap.
Before you start, push and twist the stamp into the cap a few times to load the pigment.
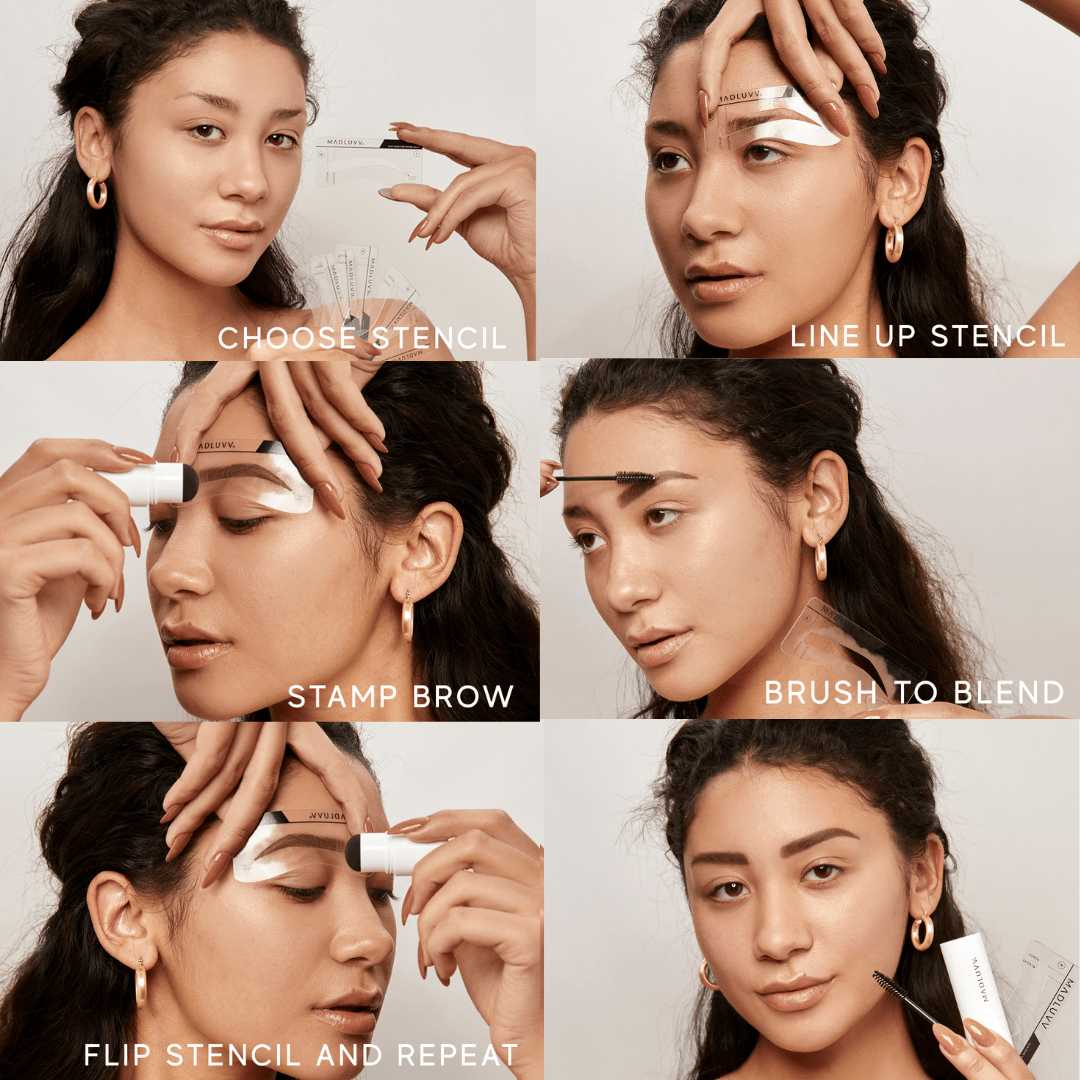
✨ This “primes” the stamp so you get full color payoff — don’t skip this step!✅ 2️⃣ Choose your stencil.
You’ll know you found the right one when it fits the most of your natural brow hairs.✅ 3️⃣ Place the stencil on your brow.
Hold it in place firmly by placing your fingers on the two black dots on the stencil — this helps you keep it steady while you stamp!✅ 4️⃣ Tap to stamp!
Lightly tap the Brow Stamp into your brow, starting at the tail and working inward.
✨ Light taps = softer look. More taps = bolder brows. ✨It is advised to stamp dark near the tail and lighter in the front of the brow. This creates a natural ombre look✅ 5️⃣ Now switch sides.
Wipe off the stencil, flip it, and repeat the stamping on your other brow.
✨Even Brows Trick: If you line up the beginning of the stencil to the beginning of your other brow and shift it over to the brow you still need to do, your brows should stay in line (but keep in mind that brows tend to be sisters and not twins).✅ 6️⃣ Blend it out.
Use the spoolie (brush end) to blend — this softens the front of the brow for a natural finish.
✨ That’s it — simple, right? With a little practice, you’ll be stamping like a pro!